GROQ
Train a custom EVI Language Model using a GROQ-based LLM on Hugging Face with our own dataset: /livethelifetv/groq

Prerequisites
Ensure you have the following installed:
- Python (3.8+)
- Poetry (for dependency management)
- Uvicorn (for running the FastAPI server)
- Ngrok (for exposing local services to the internet)
- Hugging Face Transformers (to leverage GROQ-based LLM)
- LangChain (for integrating the language model)
- Fugue (to parallelize data processing across distributed environments)
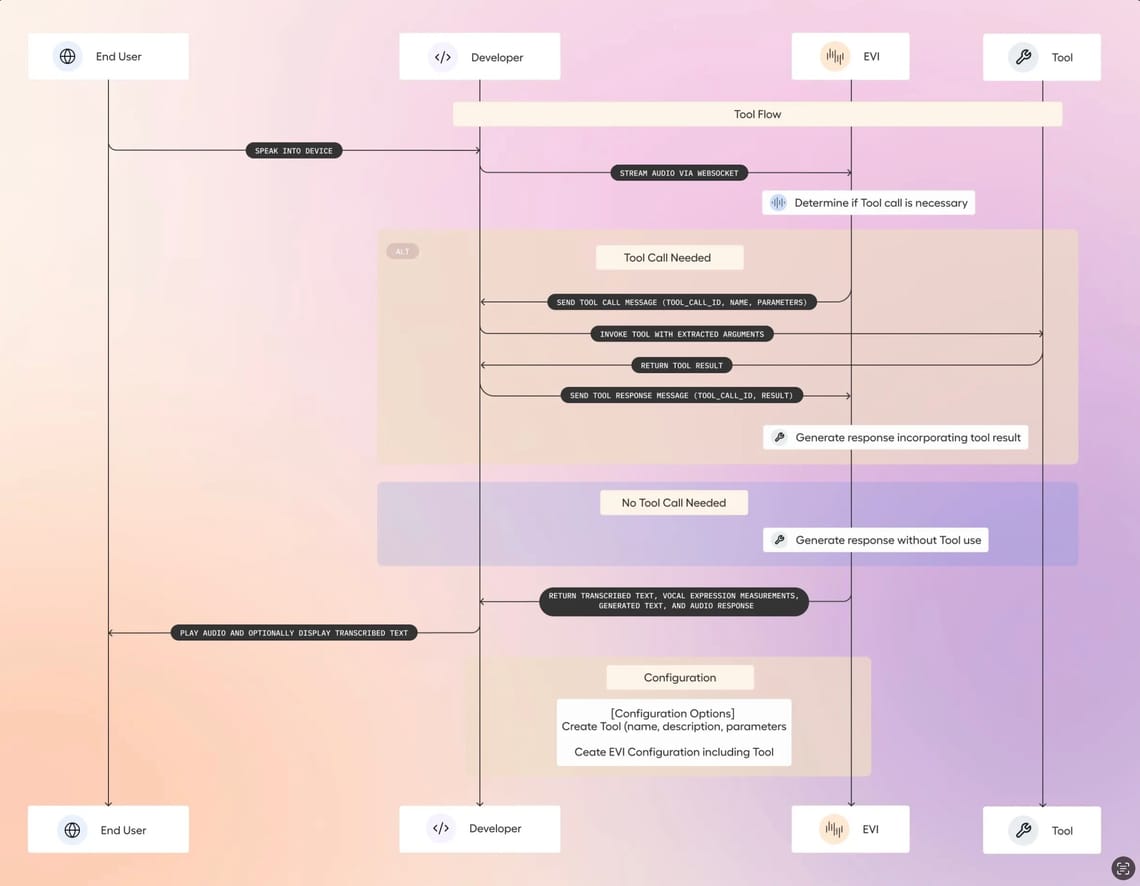
Setup Steps
1. Start the FastAPI socket
First, we need to create the backend where your GROQ-based LLM will listen to requests. Navigate to your project directory and start the FastAPI app with live reload for development purposes:
poetry run uvicorn main:app --reload
This will start your API locally.
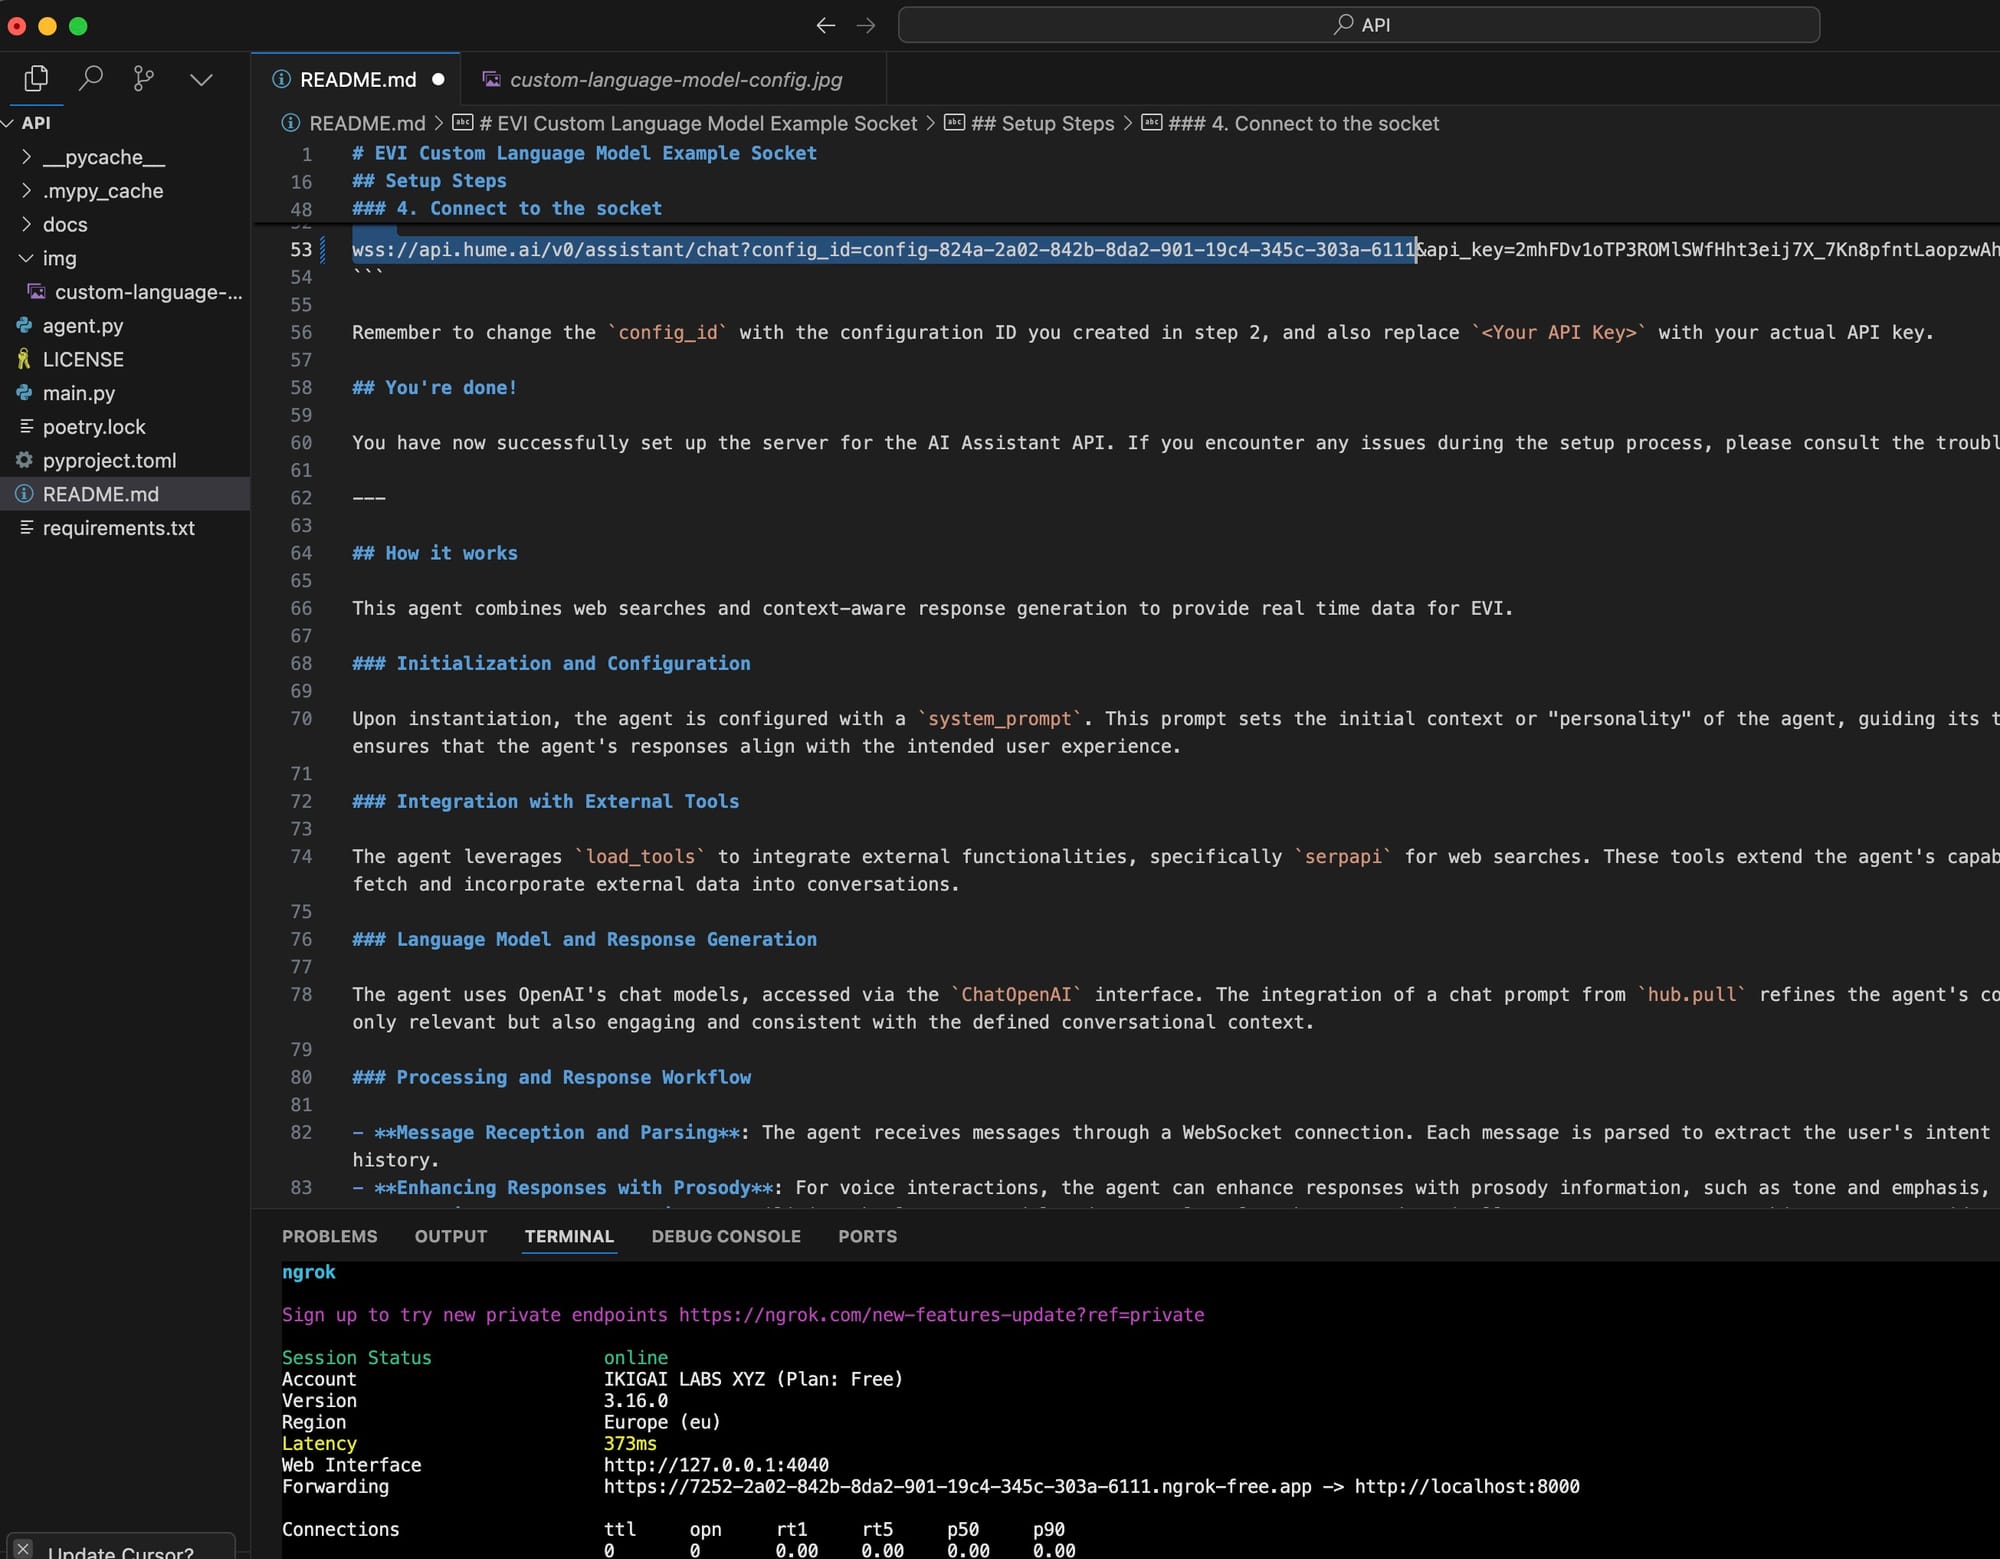
2. Expose the FastAPI app using Ngrok
In a separate terminal window, use Ngrok to make your local API accessible over the internet:
ngrok http 8000
This will give you a public URL (something like https://<ngrok-id>.ngrok-free.app) that your model can connect to.
3. Create a Custom Model on Hugging Face
To integrate a GROQ-based LLM, train a custom language model with Hugging Face's transformers library.
Train the model on GROQ hardware:
You can fine-tune a model such as GPT-J or GPT-Neo using the GROQ backend. Hugging Face provides support for accelerated training on GROQ hardware.Example for fine-tuning a GPT model:
from transformers import GPTNeoForCausalLM, Trainer, TrainingArguments

model = GPTNeoForCausalLM.from_pretrained("EleutherAI/gpt-neo-2.7B")

training_args = TrainingArguments(
    output_dir="./results",
    num_train_epochs=3,
    per_device_train_batch_size=2,
    warmup_steps=500,
    weight_decay=0.01,
    logging_dir='./logs',
    logging_steps=10,
)

trainer = Trainer(
    model=model,
    args=training_args,
    train_dataset=dataset['train'],
)

trainer.train()
Prepare your dataset: Format your dataset in a Hugging Face-compatible format (CSV, JSON, etc.) and load it using the datasets library:
from datasets import load_dataset

dataset = load_dataset('path/to/your/dataset')
4. Deploy the Model on Hugging Face Spaces
Once your model is trained, deploy it on Hugging Face Spaces or use the Hugging Face Inference API to serve your model.
To deploy via Hugging Face Spaces, follow the instructions for hosting models on Hugging Face. Alternatively, for live inference, use the transformers library to load your model and run inference via API calls.
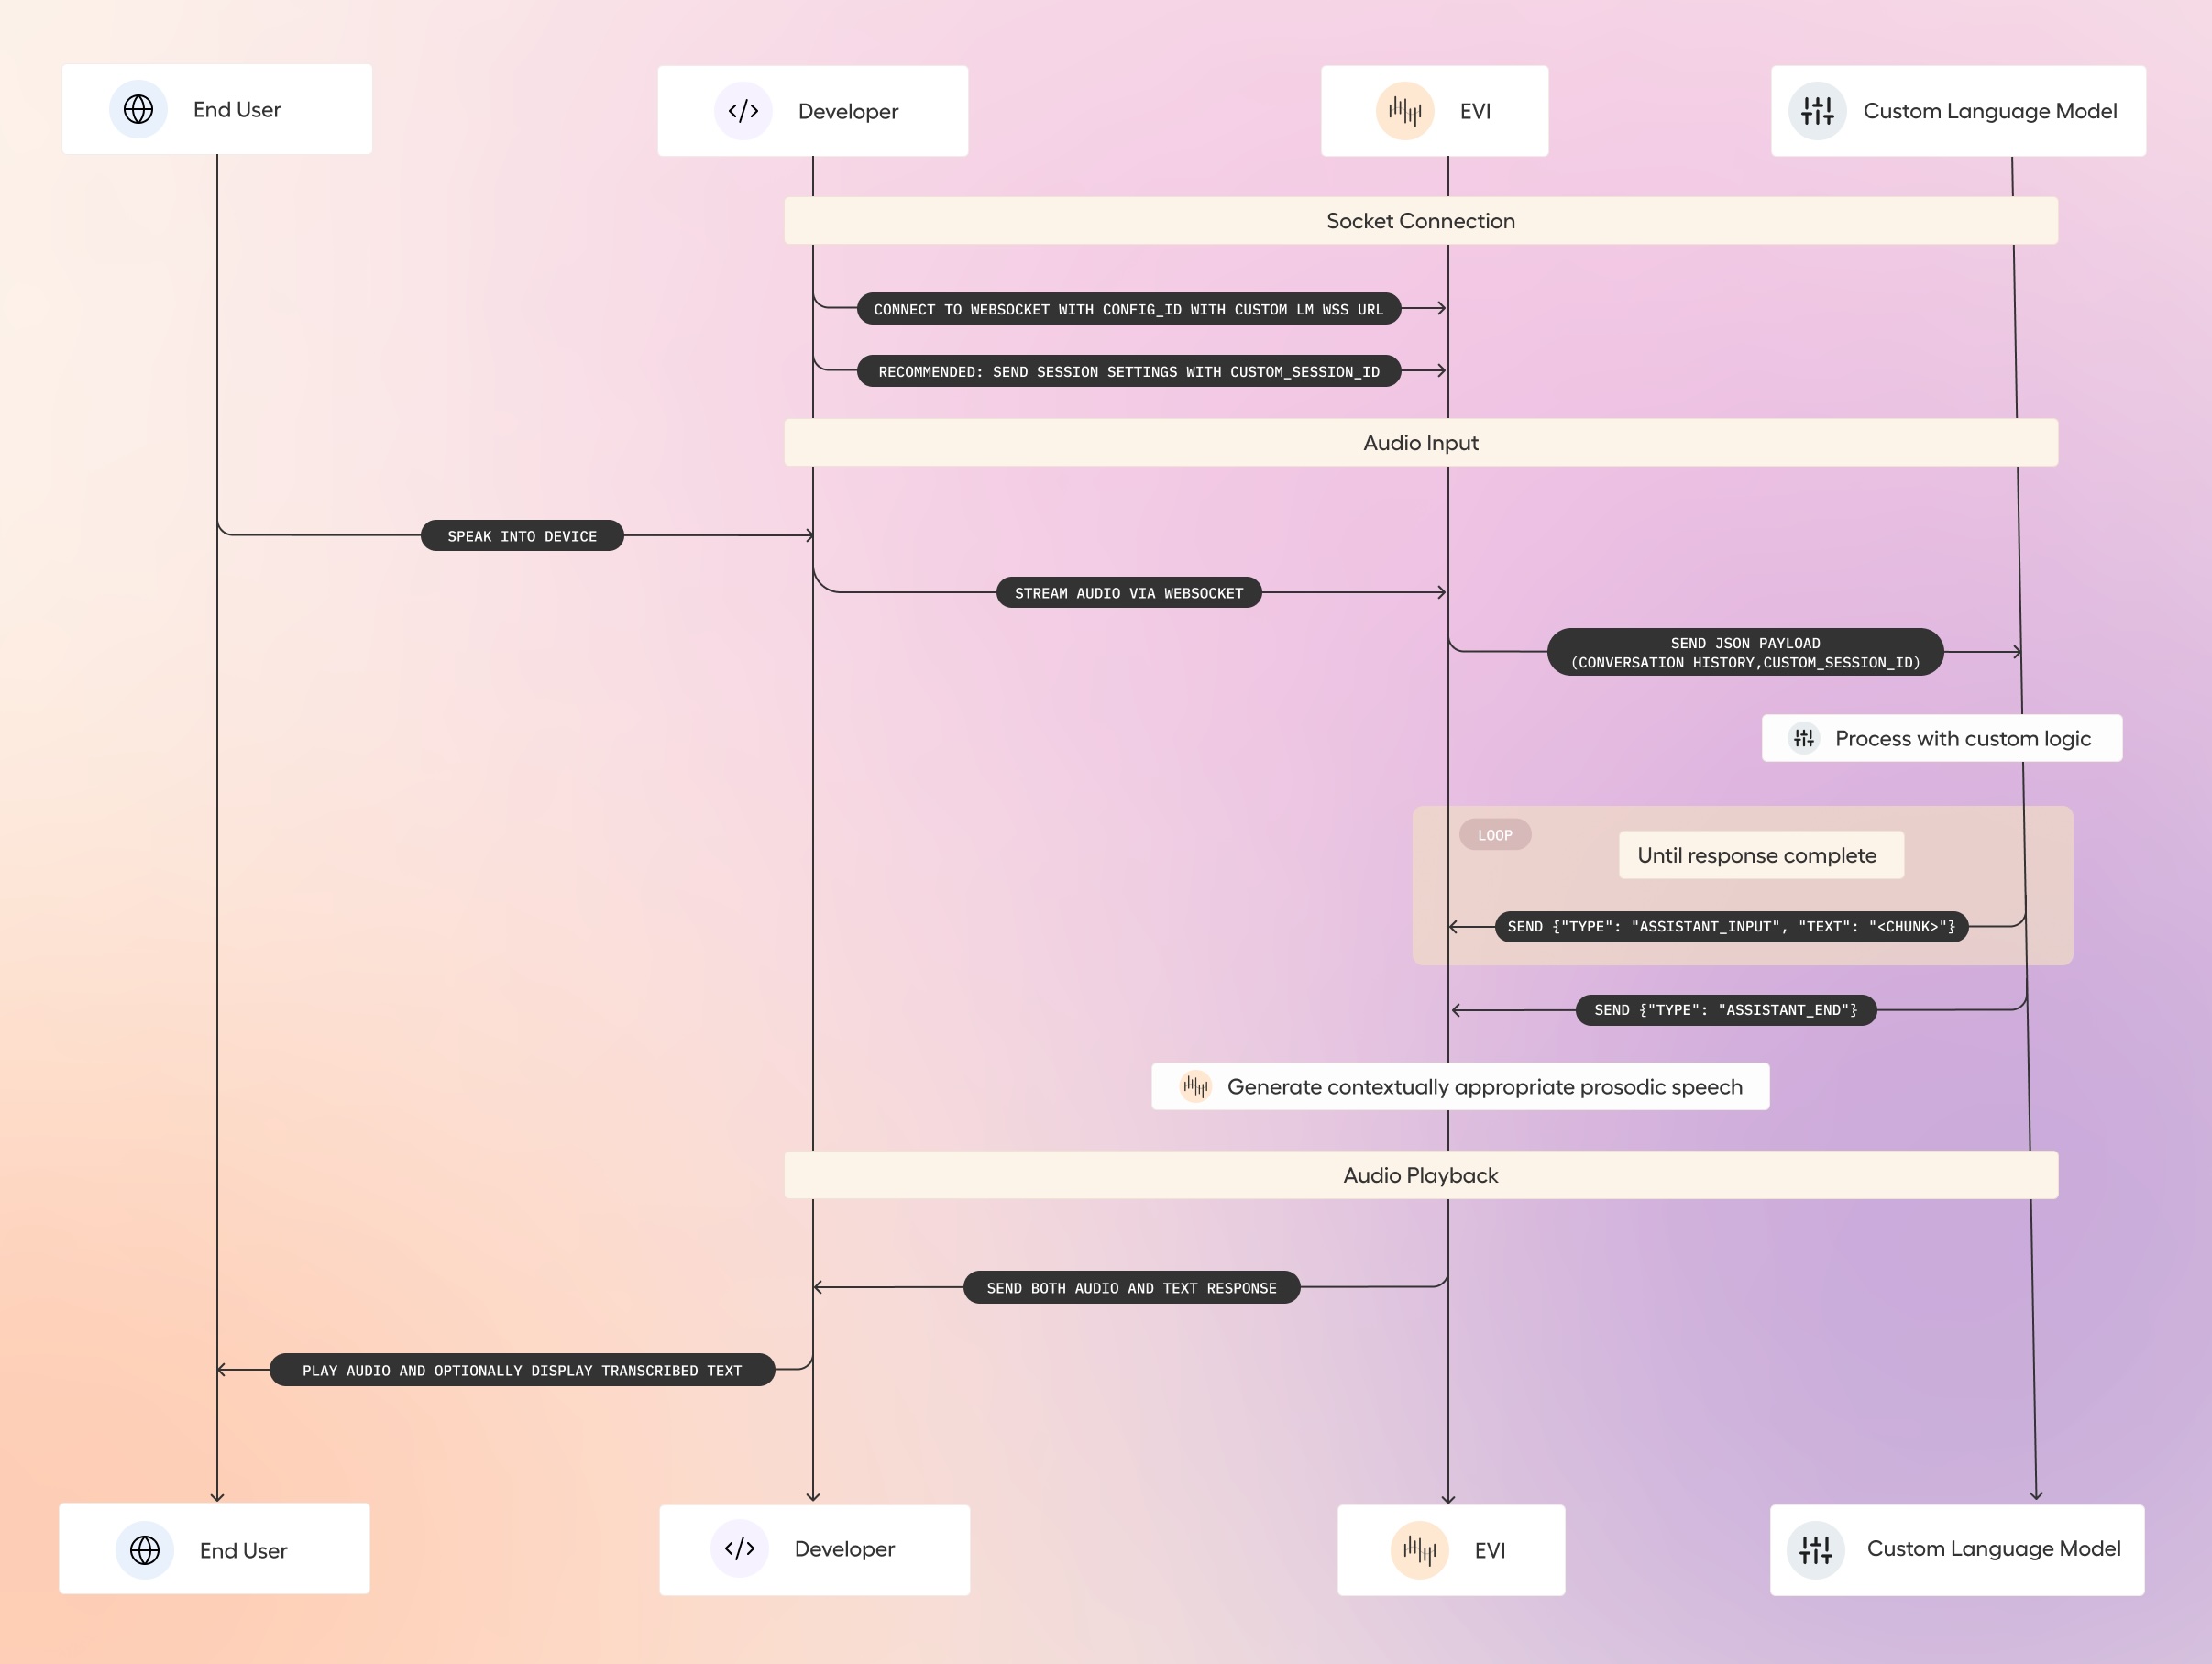
5. Integrate with the EVI Socket
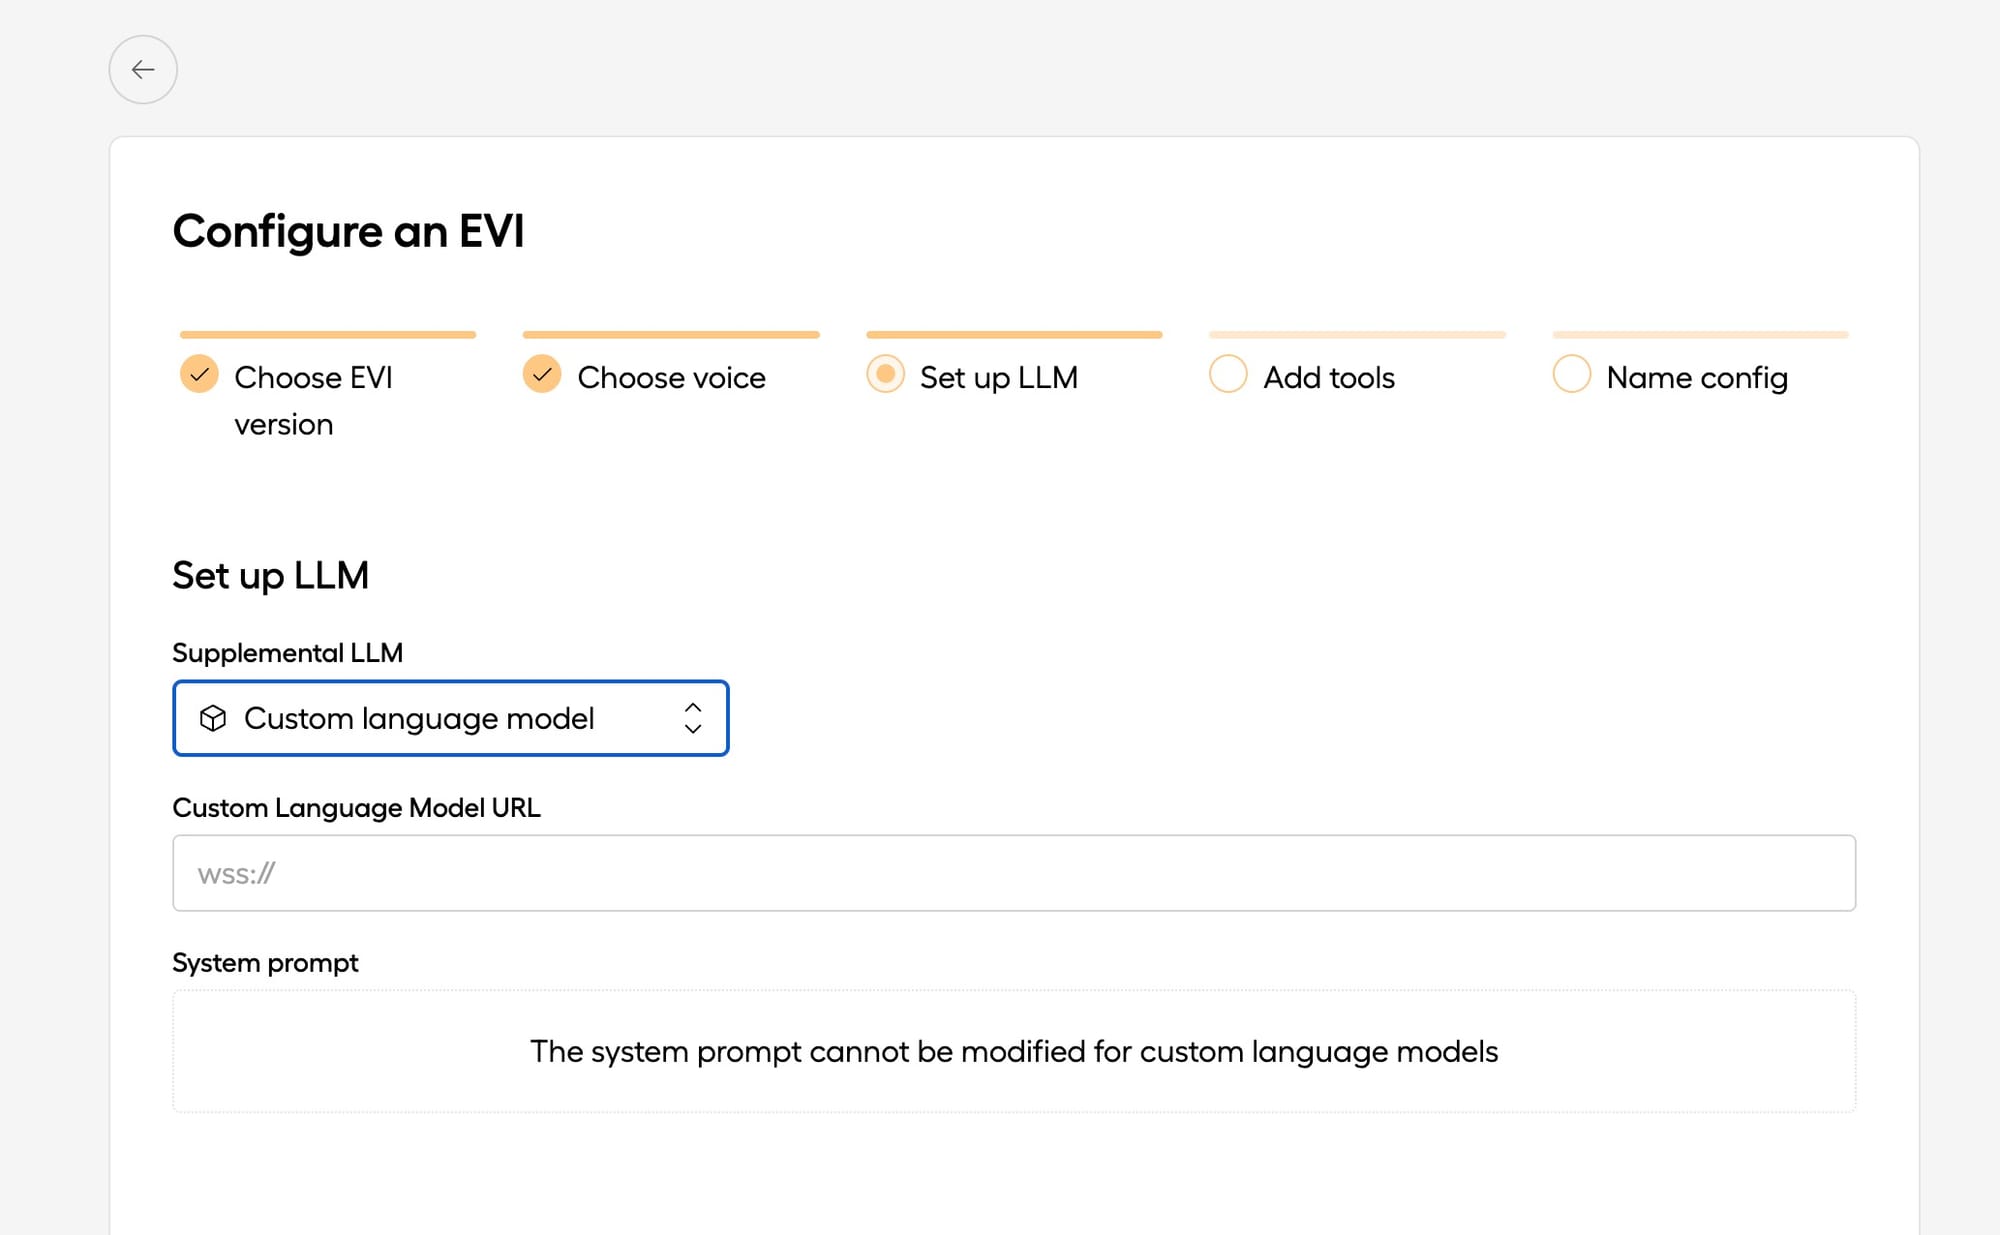
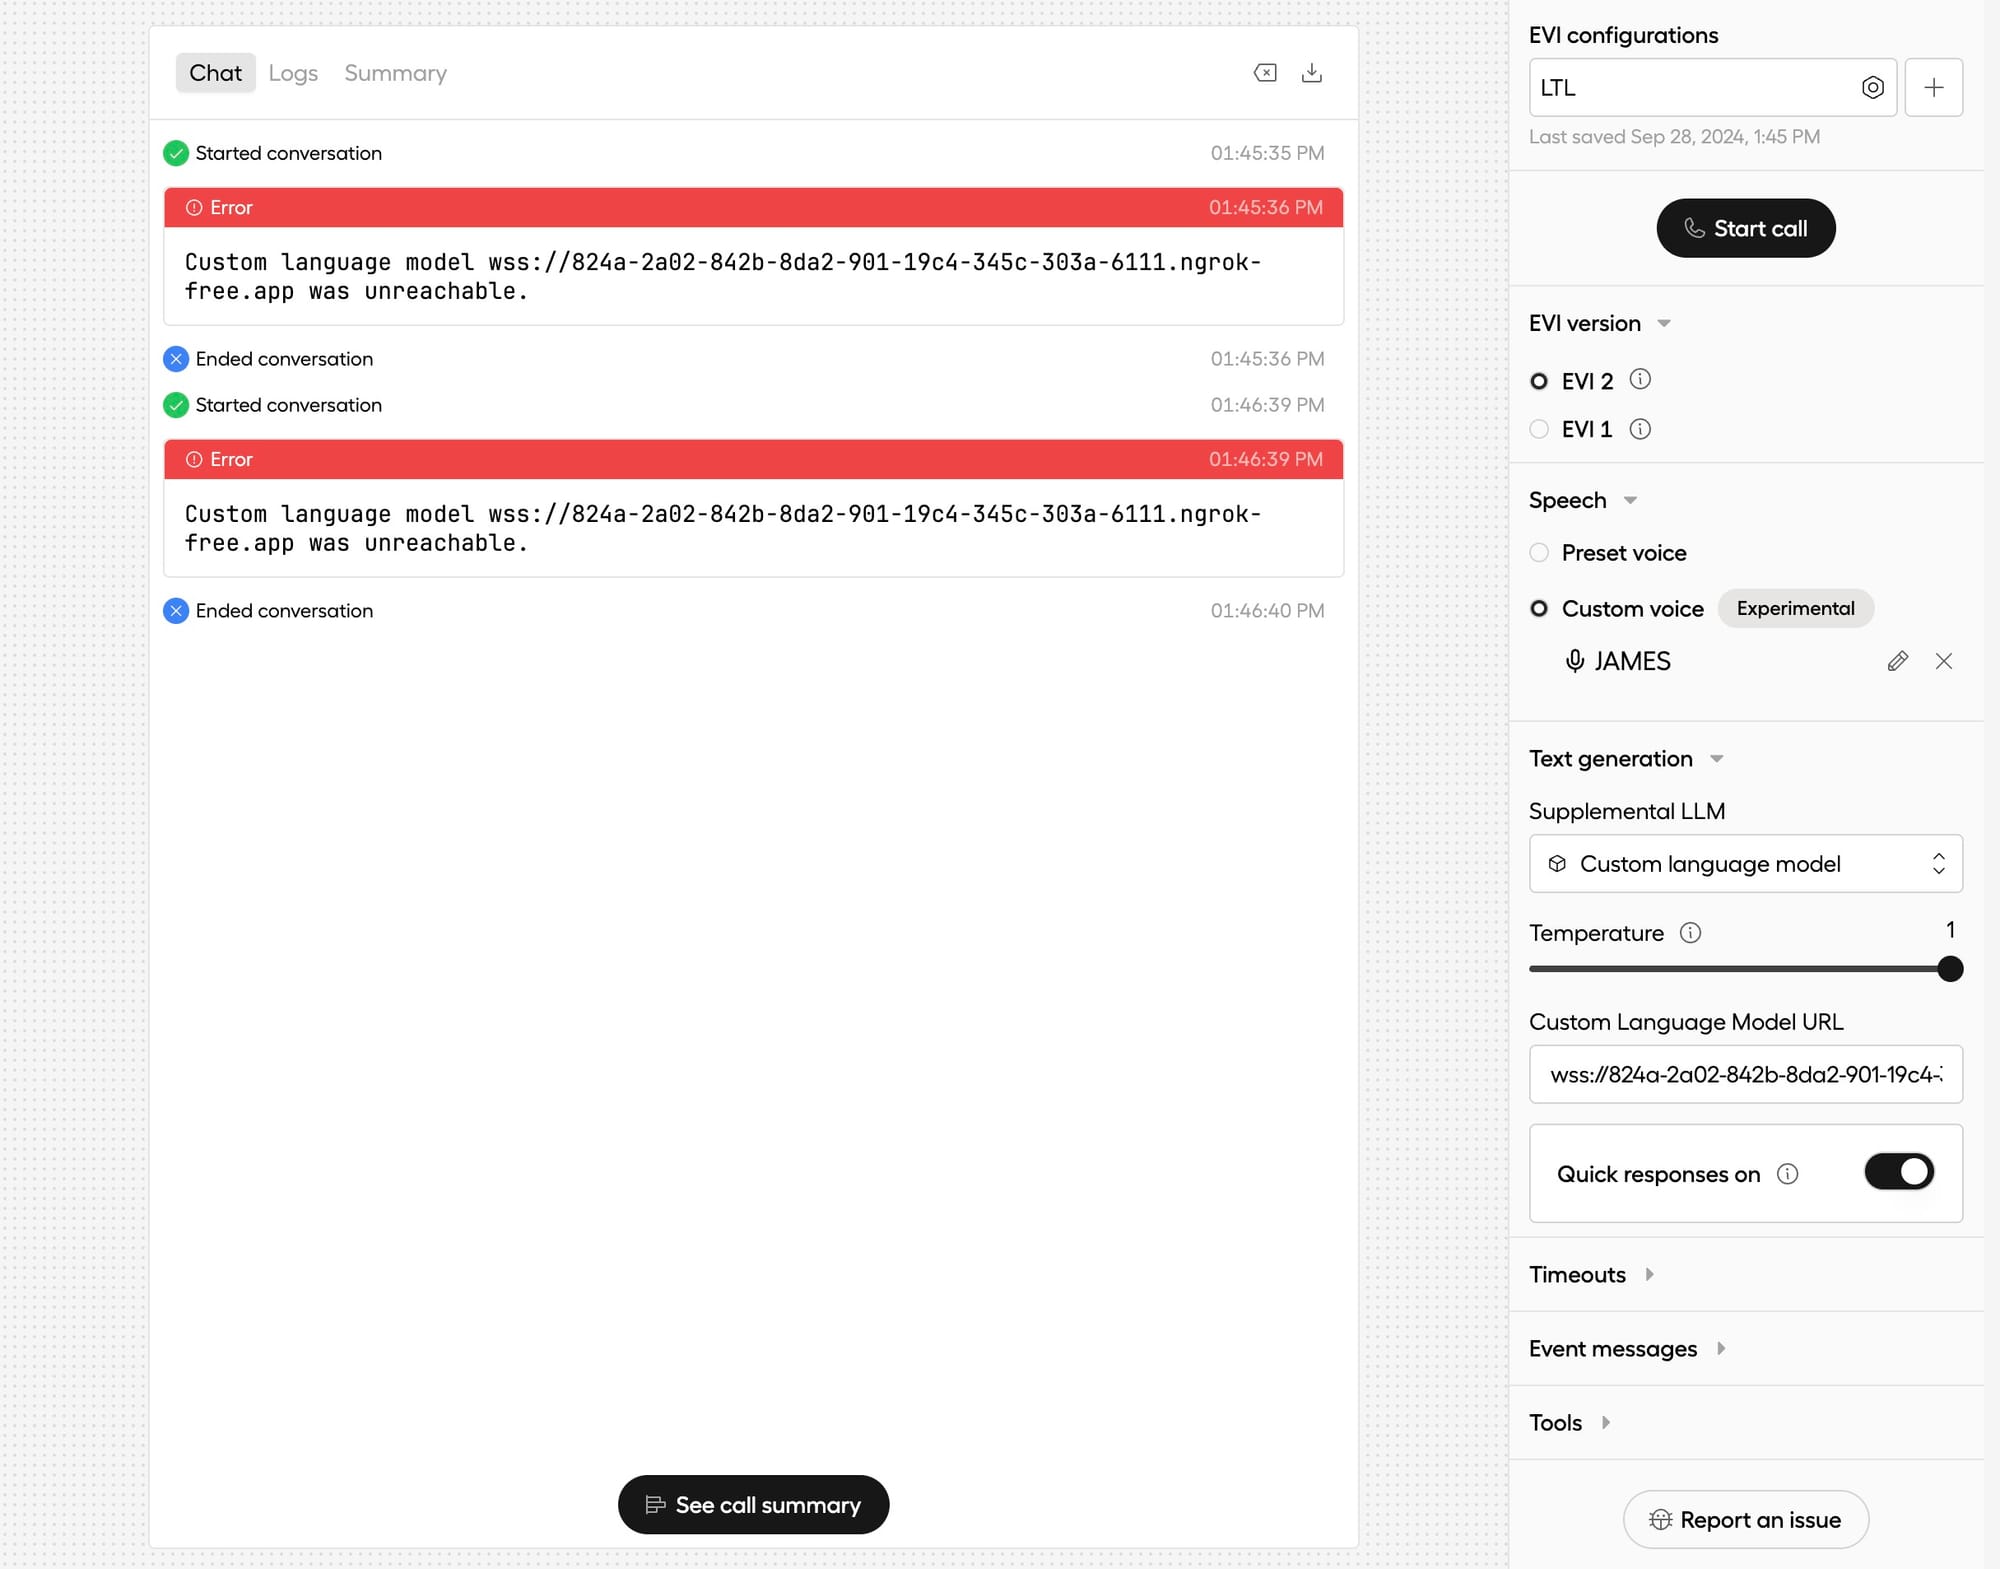
Now that your model is trained and hosted, integrate it with the EVI custom language model socket. In Hume's portal, create a custom voice configuration pointing to the model.
- Use the Ngrok URL (
wss://<ngrok-id>.ngrok-free.app) in the voice configuration to point to the FastAPI server that will use the model for inference.
6. Connect the EVI Model via WebSocket
To make sure your custom language model is used in production, modify your socket connection to pass the correct configuration ID and API key:
wss://api.hume.ai/v0/assistant/chat?config_id=<config-id>&api_key=<your-api-key>
Replace the placeholders with your actual config_id and API key.
7. Using GROQ-Based Models for Faster Inference
GROQ hardware excels in low-latency inference. With Hugging Face integration, it reduces the time for model inference, making it a solid choice for real-time applications like conversational agents.
- GROQ Inference Setup: Use Fugue and GROQ SDK to distribute data processing for faster inference, allowing parallel processing of multiple queries.
Example:
from groqflow import run

# Sample data batch
batch_data = [{"input_text": "Your text here"}]

# Execute the model inference using GROQ backend
run(model, batch_data)
Wrap-Up
You have now successfully trained and deployed your custom EVI language model using GROQ-based LLMs on Hugging Face, integrated with a FastAPI socket that can be accessed publicly via Ngrok.
Next Steps:
- Fine-tune your model further on larger datasets.
- Optimize the FastAPI server for high traffic.
- Implement advanced session management with LangChain for more sophisticated interactions.
Here’s a detailed breakdown of how to fine-tune these models using the GROQ backend via Hugging Face.
https://huggingface.co/spaces/livethelifetv/groq
What is GROQ?
GROQ is a specialized processor designed for accelerating machine learning workloads, focusing on large-scale language models (LLMs), AI, and deep learning. The architecture is highly efficient for models like GPT due to its parallelism, which significantly reduces training and inference times. It provides acceleration in both training and inference, making it suitable for fine-tuning large models with custom datasets.
Steps to Fine-Tune GPT Models on GROQ
1. Setting up GROQ Environment
To use GROQ hardware, ensure you have access to the GROQ SDK and that your environment is properly set up to leverage GROQ's processors. Follow the installation instructions for the SDK:
- Install
groqflow, which integrates GROQ hardware with Python ML pipelines. - Ensure your Hugging Face environment is set up with Python 3.8+ and the
transformersanddatasetslibraries.
Example installation:
pip install transformers datasets groqflow
2. Choose the Model
Models like GPT-J or GPT-Neo are large-scale language models known for their efficiency in generating coherent and context-aware text. Here’s how to load a model using Hugging Face’s transformers library:
from transformers import GPTNeoForCausalLM, GPT2Tokenizer

# Load GPT-Neo (2.7B parameter model)
model = GPTNeoForCausalLM.from_pretrained("EleutherAI/gpt-neo-2.7B")
tokenizer = GPT2Tokenizer.from_pretrained("EleutherAI/gpt-neo-2.7B")
3. Prepare the Dataset
Before fine-tuning, format your dataset using Hugging Face's datasets library. You can load your dataset in various formats like CSV, JSON, or directly from Hugging Face Datasets Hub.
Example dataset loading:
from datasets import load_dataset

# Load your dataset
dataset = load_dataset('path/to/your/dataset')
Ensure the dataset is properly tokenized for GPT-based models:
def tokenize_function(examples):
    return tokenizer(examples["text"], truncation=True, padding="max_length")

tokenized_datasets = dataset.map(tokenize_function, batched=True)
4. Set Up Training on GROQ Hardware
GROQ's hardware specializes in parallelism and efficiency for large-scale AI models. By using the groqflow library, you can compile and execute models on GROQ processors.
- Compile the Model for GROQ:
Groqflow compiles the model to the GROQ hardware’s native format, optimizing for the architecture.
from groqflow import groqflow

# Compile the model for GROQ hardware
compiled_model = groqflow(model)
- Fine-Tuning Setup:
Using Hugging Face’sTrainerAPI with GROQ backend, you can fine-tune your GPT model efficiently. Set training arguments such as the number of epochs, batch size, and learning rate.
from transformers import Trainer, TrainingArguments

training_args = TrainingArguments(
    output_dir="./results",
    num_train_epochs=3,                  # Number of epochs
    per_device_train_batch_size=8,       # Adjust based on GROQ capacity
    per_device_eval_batch_size=8,
    warmup_steps=500,                    # Number of warmup steps
    weight_decay=0.01,                   # Strength of weight decay
    logging_dir='./logs',                # Directory for logging
    logging_steps=10,
    evaluation_strategy="epoch",
    save_total_limit=2,                  # Save checkpoints
)

# Create a Trainer instance
trainer = Trainer(
    model=compiled_model,
    args=training_args,
    train_dataset=tokenized_datasets["train"],
    eval_dataset=tokenized_datasets["validation"],
)
5. Start Fine-Tuning
Initiate the fine-tuning process with the Trainer. GROQ hardware will automatically optimize the performance based on the model architecture, improving the speed of each epoch:
trainer.train()
During training, GROQ’s hardware will perform optimizations such as:
- Parallel Tensor Processing: GROQ excels at matrix multiplication, speeding up the time it takes to train LLMs, especially with large datasets and batch sizes.
- Lower Latency Inference: Once the model is fine-tuned, GROQ hardware significantly reduces latency during inference, making it ideal for real-time applications.
6. Monitor Training Progress
The Hugging Face Trainer API provides built-in support for logging and evaluation. You can monitor progress with TensorBoard:
tensorboard --logdir=./logs
This will open up a web interface where you can track metrics such as loss, accuracy, and model performance across epochs.
7. Model Inference on GROQ
Once fine-tuning is complete, you can use GROQ hardware for inference. This is particularly useful for real-time applications such as chatbots, AI assistants, or other systems requiring low-latency responses.
from groqflow import run

# Perform inference using the GROQ compiled model
input_text = "Once upon a time in a faraway land,"
inputs = tokenizer(input_text, return_tensors="pt")

# Execute on GROQ hardware
output = run(compiled_model, inputs)

print(tokenizer.decode(output, skip_special_tokens=True))
Key Benefits of GROQ in Fine-Tuning LLMs:
- Speed: The parallelism and custom architecture of GROQ significantly reduce training time compared to traditional GPUs.
- Efficiency: Optimized for large-scale tensor computations, GROQ hardware uses less power and can handle larger batches.
- Scalability: GROQ’s efficiency makes it easier to scale your models and handle large datasets during fine-tuning.
- Low Latency Inference: Once fine-tuned, using GROQ hardware for inference leads to quicker response times, ideal for real-time applications like chatbots or voice assistants.
Setting Up AutoTrain on Hugging Face Spaces
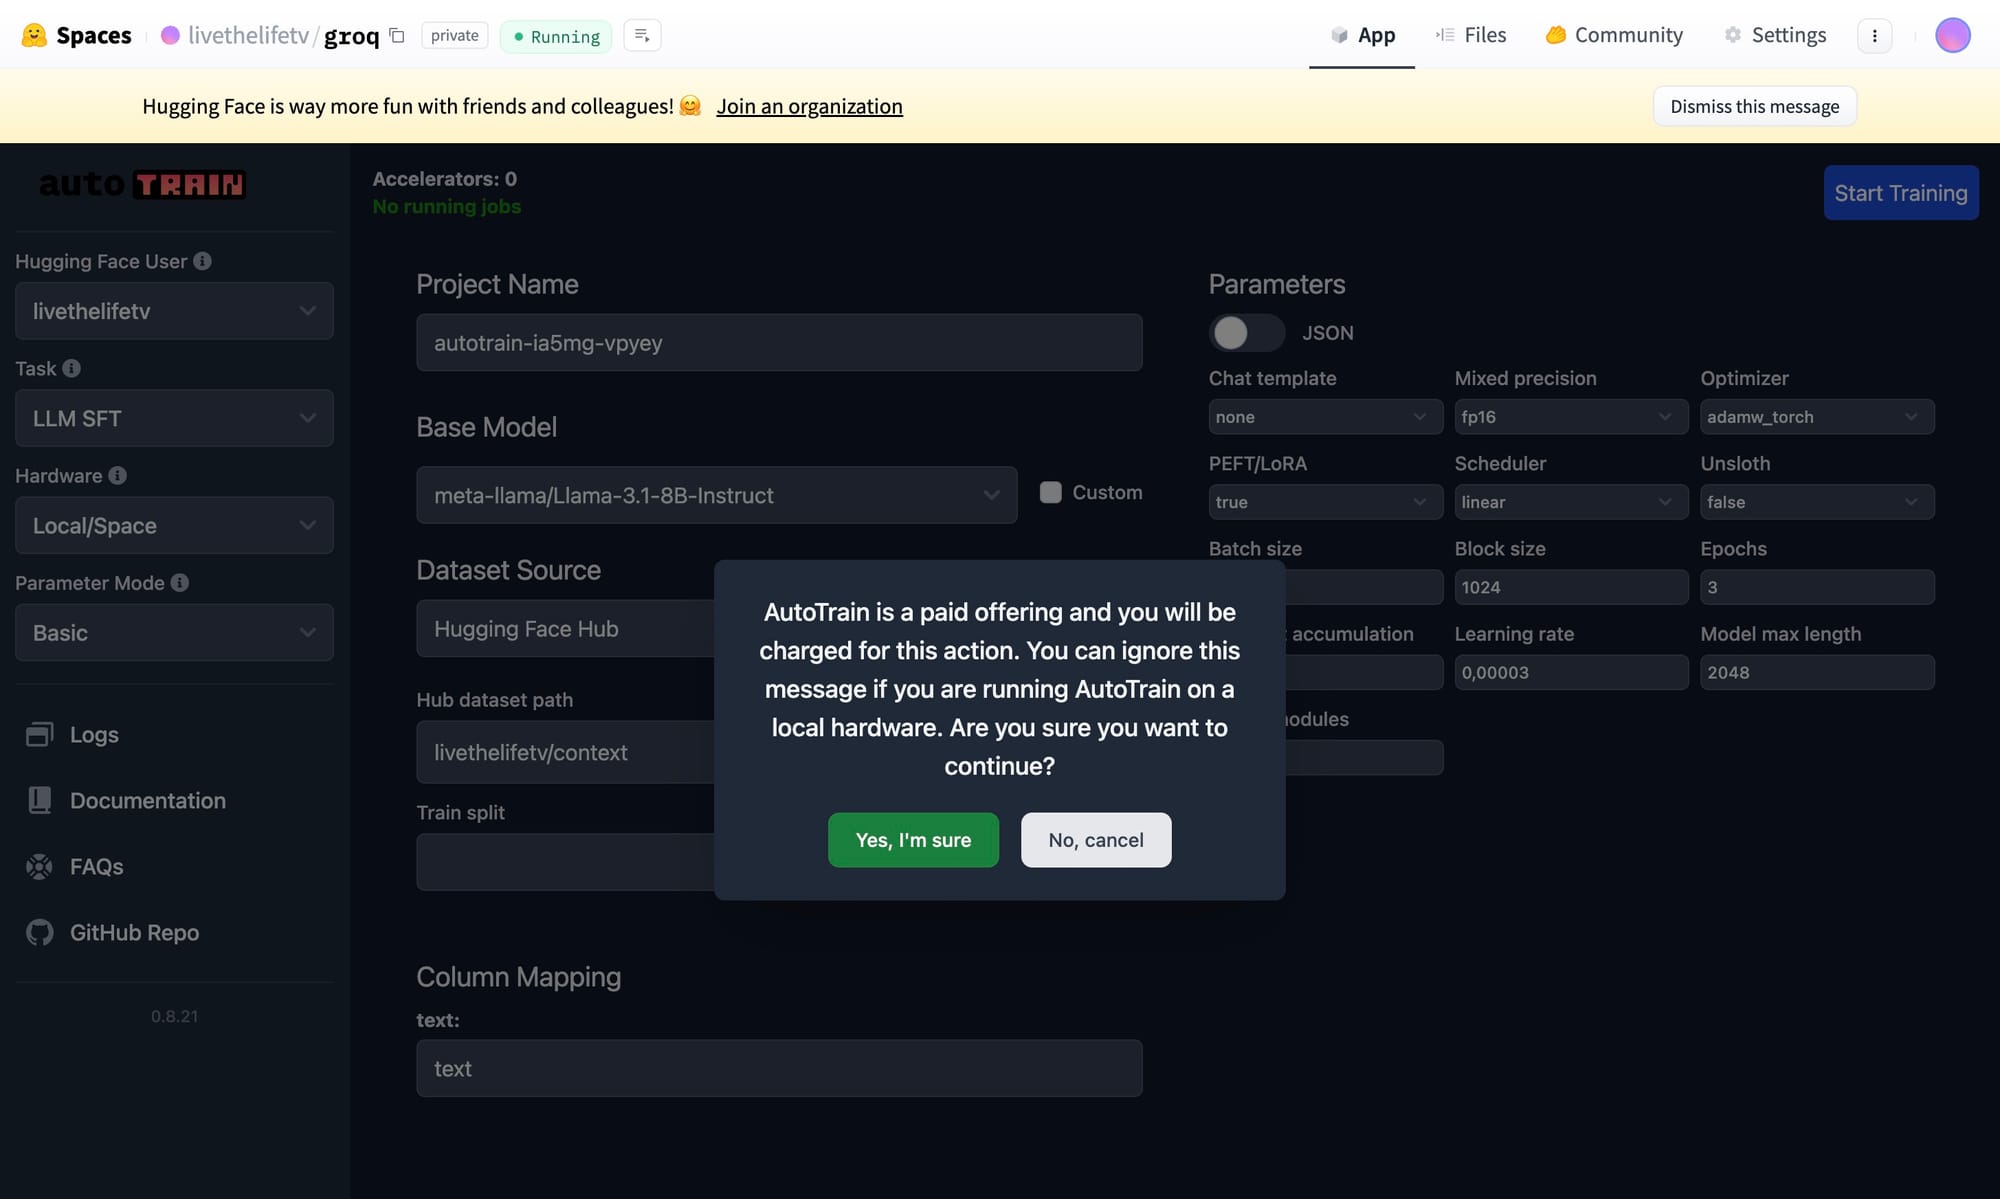
AutoTrain Advanced allows you to easily train machine learning models on Hugging Face Spaces without needing to manage your own infrastructure. Here's how you can set it up:
Step-by-Step Guide to Deploy AutoTrain on Hugging Face Spaces
Step 1: Create a Hugging Face Account
If you don’t have an account yet, sign up for a free account on Hugging Face.
- Go to: https://huggingface.co/join
Once signed in, you can access Hugging Face Spaces from your account dashboard.
Step 2: Create a New Space
- Navigate to Spaces by clicking on your profile icon at the top right, and select New Space.
- Select the Framework: Choose Gradio or Streamlit as the framework, as AutoTrain Advanced's UI is compatible with these frameworks.
- Set Space Visibility:
- Public: Anyone can access and use the Space.
- Private: Only people with the right access permissions can use the Space (you may incur additional costs for private spaces).
- Name Your Space: Choose a name that represents the purpose of your AutoTrain project.
Step 3: Clone AutoTrain Advanced Repository
Once the Space is created, you'll need to clone the AutoTrain repository to set up your environment. Do this by following these steps:
- Open your terminal (locally) or the Hugging Face online editor.
Push the cloned repository back to your Hugging Face Space:
git add .
git commit -m "Added AutoTrain Advanced to Space"
git push
Clone the AutoTrain repository directly into your Space:
git clone https://github.com/huggingface/autotrain-advanced.git
cd autotrain-advanced
Step 4: Modify Your Space Configuration
In the repository you just cloned, there are configuration files that define the environment.
app.pyormain.py: This is the entry point for running AutoTrain UI.- Customize Settings: If you need to change any environment settings, modify the
app.pyfile accordingly (e.g., change the port or host address if required).
requirements.txt: This file specifies the dependencies needed for AutoTrain to run. Ensure that it includes the following:
autotrain-advanced
torch
torchvision
torchaudio
gradio
Step 5: Build and Deploy
Once the files are ready:
- Build the Space: Go to your Space page on Hugging Face and click "Build". This will initiate the environment setup and start the application deployment process.
- Deployment: Once the build is complete, your Space will be deployed, and you can start using AutoTrain directly from your Hugging Face Space.
Step 6: Train Models in AutoTrain
With AutoTrain set up, you can now start using the UI to:
- Upload Datasets: Make sure your data is in the correct format (CSV, JSON, etc.). You can check the AutoTrain documentation for details on formatting.
- Select Model Type: Choose the type of model you want to train (text, vision, etc.).
- Customize Settings: Configure the training parameters, including training duration, batch size, and other hyperparameters.
Once configured, click Train to start training your model. The training will run on Hugging Face’s infrastructure, and you will only be billed for the resources used.
To train models using AutoTrain Advanced with JSONL (JSON Lines) format, you will need to ensure your data is structured correctly and compatible with AutoTrain. Here's how you can prepare your JSONL file and upload it to your Hugging Face Space for training:
Step-by-Step Guide: Using JSONL with AutoTrain
Step 1: Understand the JSONL Format
JSONL format consists of multiple JSON objects, where each object is written on a new line. Each line corresponds to a sample in your dataset.
Example for text classification:
{"text": "This is a positive review.", "label": "positive"}
{"text": "This is a negative review.", "label": "negative"}
Example for text generation:
{"prompt": "Once upon a time", "completion": "in a land far, far away..."}
{"prompt": "The future of AI is", "completion": "bright and full of potential."}
Ensure that your JSONL file has consistent keys and that each key corresponds to the feature you want the model to use (e.g., text, label, prompt, completion).
Step 2: Upload JSONL to Hugging Face Spaces
- Navigate to the AutoTrain UI: After deploying AutoTrain on Hugging Face Spaces, access your app’s UI by visiting your Space URL (something like
https://huggingface.co/spaces/<your-space-name>). - Upload the JSONL File:
- In the AutoTrain interface, find the Upload Dataset section.
- Upload your JSONL file.
- AutoTrain will attempt to automatically detect the file format, but make sure to specify that it’s JSONL if required.
Step 3: Select Task Type
Once the dataset is uploaded, select the task type that aligns with your use case. AutoTrain supports multiple tasks, such as:
- Text Classification: For classification tasks (e.g., sentiment analysis).
- Text Generation: For generating text based on prompts.
- Entity Recognition: For named entity recognition tasks.
Make sure the structure of your JSONL file matches the task you are working on (e.g., text and label fields for classification, prompt and completion for text generation).
Step 4: Customize Model Training
AutoTrain allows you to set parameters before training begins. You can customize:
- Batch Size: Number of samples processed before updating the model.
- Learning Rate: How much to adjust the model after each batch.
- Epochs: Number of times the model will process the entire dataset.
Step 5: Start Training
Once your dataset is uploaded and you’ve configured your model, click the Start Training button. AutoTrain will:
- Preprocess your JSONL data.
- Fine-tune a machine learning model based on the task type.
- Train the model on Hugging Face's infrastructure.
Step 6: Monitor the Progress
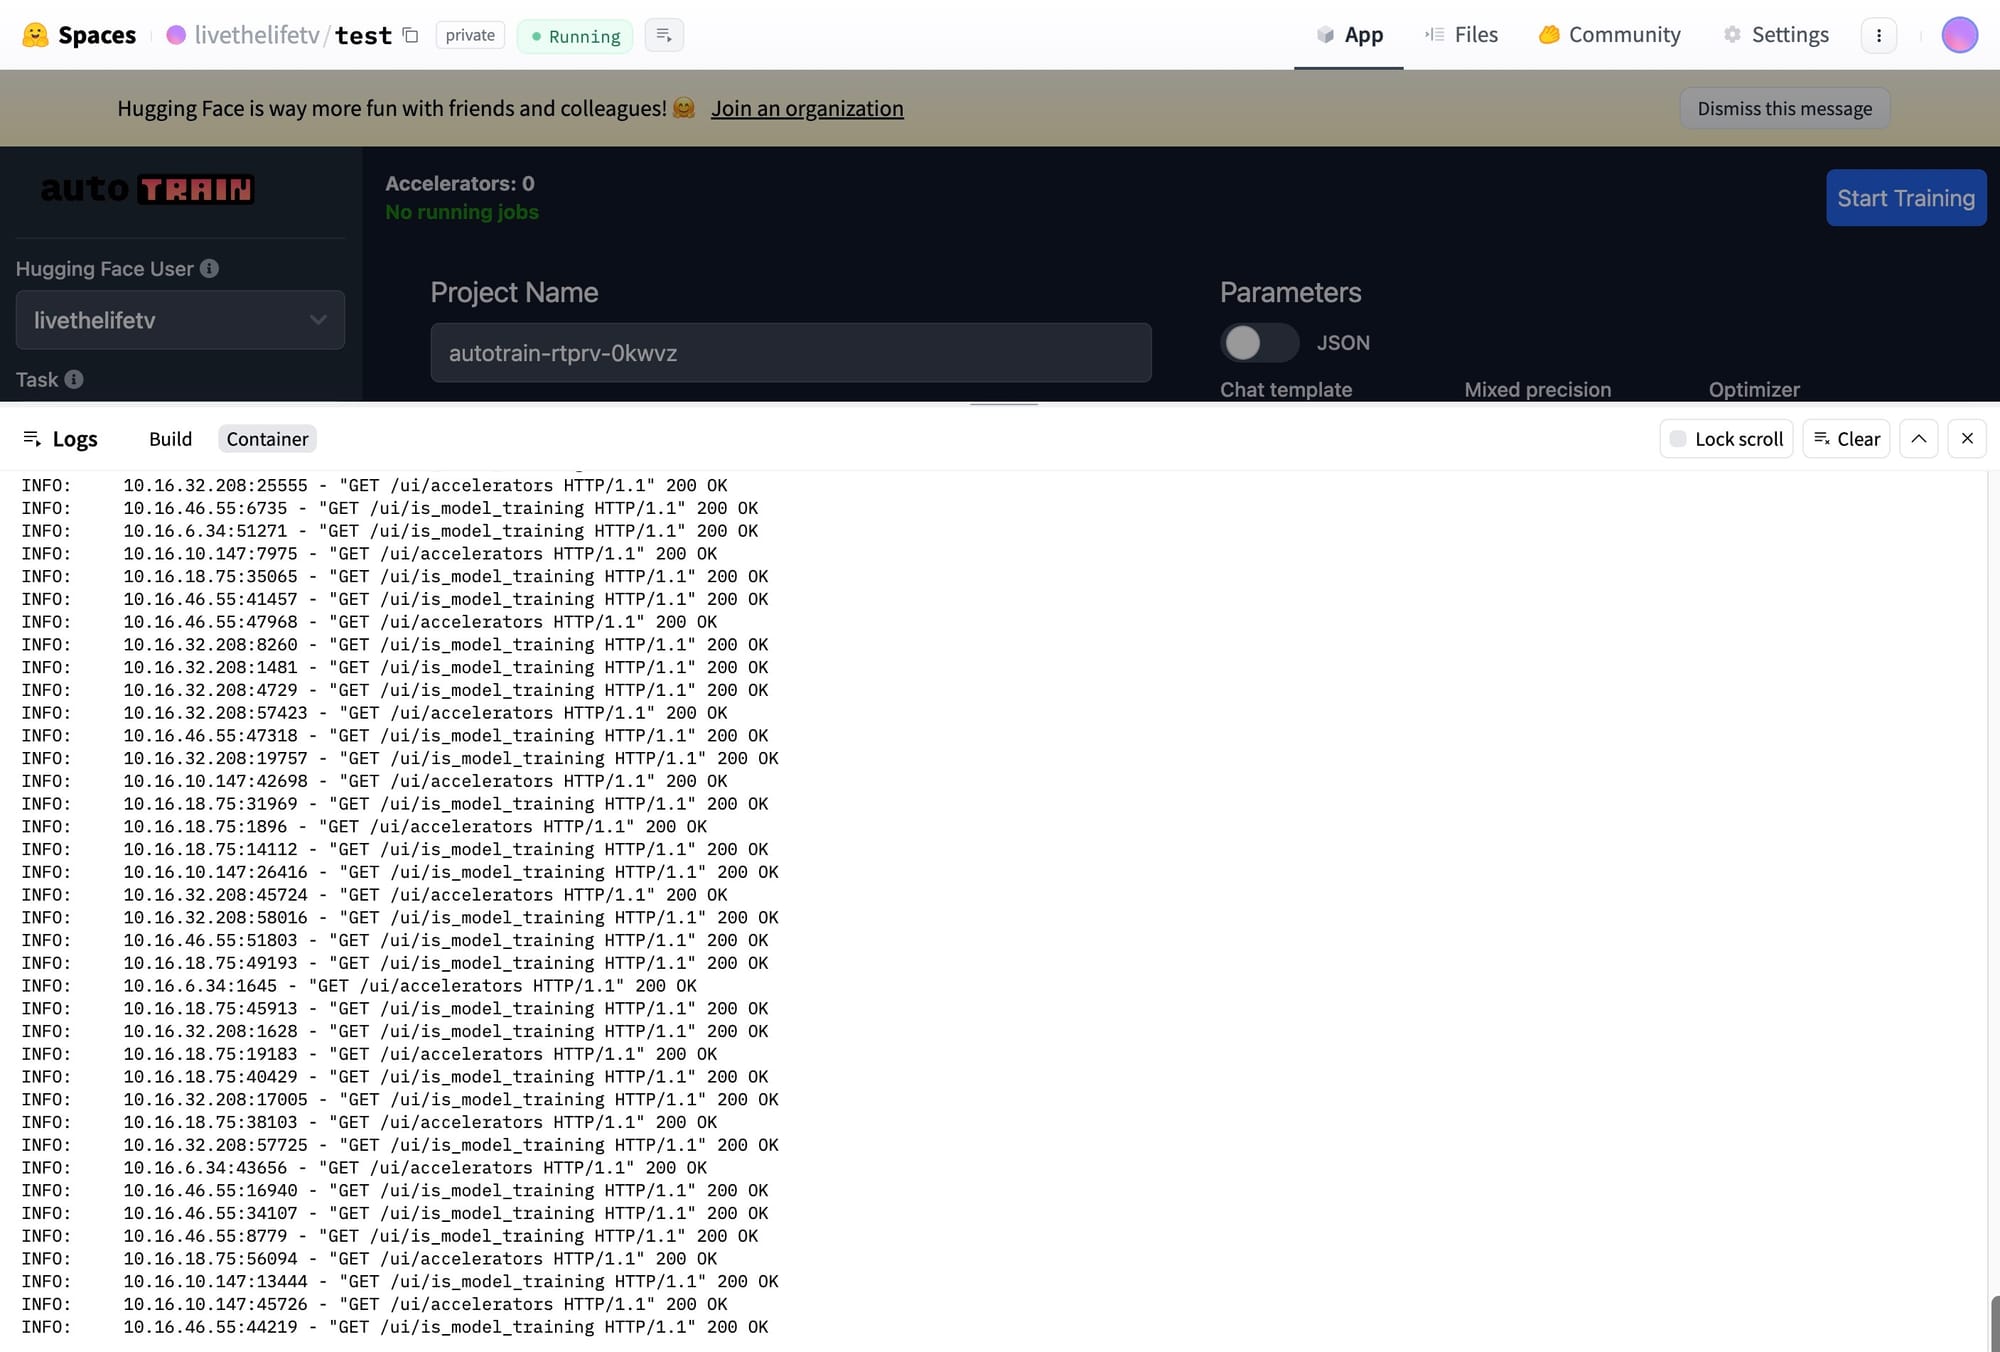
You can monitor the training process directly in the UI. Logs and metrics like accuracy and loss will be displayed to help you track how the model is performing.
JSONL Data Considerations
- Consistent Keys: Make sure every JSON object in your file has the same keys and structure.
- Task-Specific Format:
- Text Classification: The file should contain fields like
{"text": "...", "label": "..."}. - Text Generation: The file should contain fields like
{"prompt": "...", "completion": "..."}.
- Text Classification: The file should contain fields like
- Preprocessing: If your data requires preprocessing (e.g., tokenization), AutoTrain will handle it automatically. You don’t need to manually prepare the data beyond ensuring it’s properly formatted.
Example JSONL for Text Classification
{"text": "I love this product, it's fantastic!", "label": "positive"}
{"text": "The item broke after one use, not recommended.", "label": "negative"}
{"text": "The service was acceptable but could be improved.", "label": "neutral"}
You're Ready to Train!
With your JSONL data uploaded and formatted correctly, AutoTrain will take care of the heavy lifting, from data processing to model training. Once training is complete, you can evaluate and deploy your model directly from Hugging Face Spaces.
Optimizing your model training in AutoTrain is key to achieving better performance and reducing training time. Here are several strategies to optimize your model training, including hyperparameter tuning, data preprocessing, and advanced configurations.
Key Optimization Techniques for AutoTrain
1. Choose the Right Model Type
AutoTrain supports various model architectures depending on your task (text classification, text generation, etc.). Choosing the right model size and architecture can significantly impact both performance and training time.
- Smaller Models (like
distilbertorgpt2-small): Faster to train and require less computational power but might have lower performance on complex tasks. - Larger Models (like
gpt-neo,roberta-large): These models generally perform better, especially on large and complex datasets, but take longer to train.
Tip: Start with a smaller model to quickly validate your pipeline, then scale up to larger models once you’re confident in your setup.
2. Hyperparameter Tuning
a. Learning Rate
The learning rate determines how much the model weights are adjusted at each step. A learning rate too high can lead to unstable training, while a learning rate too low may slow down the training process.
- Recommended range: Start with
1e-5to1e-4for transformers. - Optimization: If you notice that training is unstable, reduce the learning rate. If training is too slow and the loss decreases too slowly, consider increasing it slightly.
In AutoTrain, you can set the learning rate in the training configuration.
b. Batch Size
Batch size impacts both model training speed and memory usage. Larger batch sizes allow the model to process more data at once, but require more GPU memory.
- Smaller Batch Size: Useful when GPU memory is limited, but results in slower training.
- Larger Batch Size: Faster training but requires more memory.
Tip: Start with a batch size that fits in memory, and gradually increase it to optimize training speed.
c. Number of Epochs
Epochs represent the number of times the model processes the entire dataset during training. More epochs can improve accuracy but also risk overfitting.
- For small datasets: 5-10 epochs might be sufficient.
- For large datasets: Fewer epochs (2-5) may be enough to achieve good performance.
Tip: Monitor validation loss during training. If it stops improving or starts increasing, reduce the number of epochs to avoid overfitting.
3. Use Efficient Data Preprocessing
a. Tokenization
For text data, efficient tokenization ensures that your data is processed and fed to the model quickly. AutoTrain handles tokenization automatically, but you can optimize it by ensuring:
- Consistent and clean input text: Remove unnecessary characters, punctuation, and stop words if applicable.
- Max sequence length: For tasks like text classification, set a reasonable max length for sequences (e.g., 128 or 256). This will reduce unnecessary computation and memory usage.
b. Data Augmentation
For tasks like text classification, you can augment your training data by creating variations of the input text (synonym replacement, paraphrasing, etc.). This helps in generalizing the model better.
AutoTrain does not handle augmentation automatically, so you may need to pre-process your data before uploading.
4. Model Checkpoints and Early Stopping
a. Early Stopping
Training models for too many epochs can lead to overfitting. Enable early stopping to automatically stop training when the validation loss does not improve for a set number of steps.
Example configuration in AutoTrain:
early_stopping_patience = 3 # Stop training if no improvement after 3 validation steps
b. Save Checkpoints
AutoTrain automatically saves model checkpoints during training. However, you can configure it to save the best-performing checkpoints by monitoring a specific metric (e.g., validation loss or accuracy).
Example configuration:
save_strategy = "epoch"  # Save at the end of every epoch
evaluation_strategy = "epoch"  # Evaluate model at each epoch to track performance
5. Gradient Accumulation
If you are working with limited GPU resources, gradient accumulation allows you to effectively use a larger batch size by splitting it across multiple smaller batches.
How it works: The model accumulates gradients over several smaller batches and performs an update only after the larger batch is processed.
gradient_accumulation_steps = 4 # Simulate a batch size 4x larger
This is useful when you want the benefits of large batches but don’t have enough GPU memory to fit them.
6. Data Shuffling
Shuffling your data ensures that each epoch is different, which can prevent the model from memorizing the order of samples.
- Enable shuffling: Most frameworks shuffle data by default, but it’s worth checking to ensure that the data is not presented in the same order each epoch.
7. Mixed Precision Training
Using mixed precision training can speed up training significantly, especially on GPUs with tensor cores (like NVIDIA's V100, A100). This allows the model to use 16-bit floating point precision (instead of 32-bit), reducing memory usage and speeding up training.
- AutoTrain may automatically handle this if your hardware supports it, but you can explicitly enable it by passing the appropriate flag.
fp16 = True # Enable mixed precision training
8. Distributed Training (Optional)
If you have access to multiple GPUs, you can enable distributed training to scale the model training process across GPUs, thus reducing training time.
AutoTrain can scale to multiple GPUs on Hugging Face Spaces if the underlying infrastructure supports it.
9. Evaluate Model Performance Regularly
It’s important to evaluate the model at regular intervals (e.g., after every epoch). This ensures that you are not wasting time training a model that is already performing optimally, or worse, overfitting.
- Evaluation metrics: Use metrics that best match your task, such as accuracy, F1 score (for classification), or perplexity (for text generation).
evaluation_strategy = "steps"  # Evaluate every few steps instead of every epoch
logging_steps = 100  # Log metrics every 100 steps
Putting It All Together: Example AutoTrain Configuration
training_args = TrainingArguments(
    output_dir="./results",
    num_train_epochs=3,                       # Number of epochs
    per_device_train_batch_size=8,            # Adjust batch size to your GPU capacity
    per_device_eval_batch_size=8,             # Evaluation batch size
    gradient_accumulation_steps=4,            # Simulate larger batch size
    evaluation_strategy="steps",              # Evaluate every 100 steps
    logging_steps=100,
    learning_rate=5e-5,                       # Learning rate
    save_strategy="epoch",                    # Save the model at each epoch
    load_best_model_at_end=True,              # Load the best model at the end of training
    fp16=True,                                # Enable mixed precision training
    early_stopping_patience=3,                # Stop early if no improvement
)
You're Ready to Optimize!
By tuning these hyperparameters and enabling optimizations such as mixed precision and gradient accumulation, you can significantly speed up training while maintaining or improving model performance.


